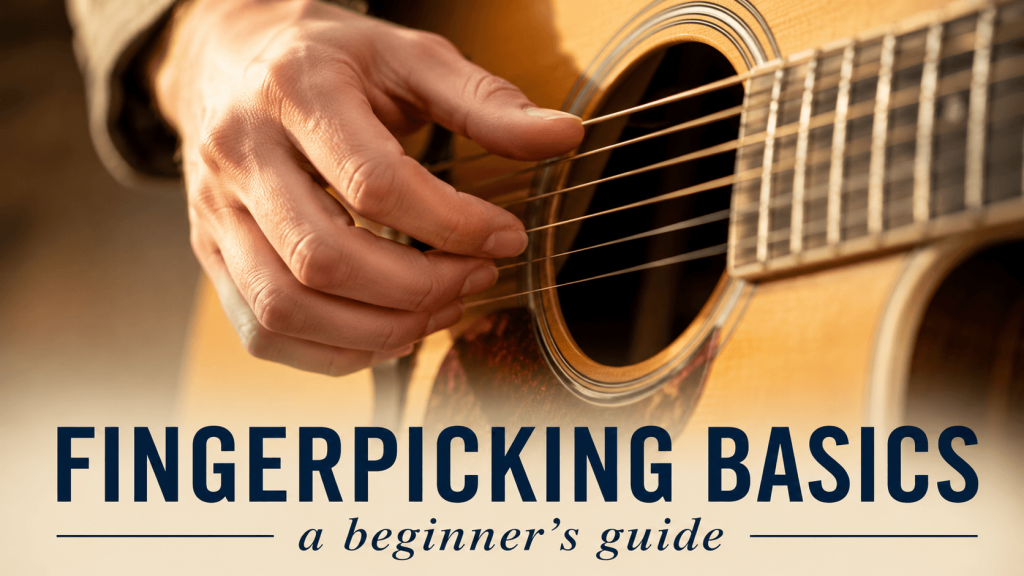
There’s a particular sound that makes people stop and listen — the gentle, interwoven, harp-like quality of a guitar being fingerpicked. It’s the sound of so much of the music people fall in love with: folk, classical, fingerstyle blues, countless quiet acoustic moments in songs of every genre. And it comes from a technique that looks far more complicated than it actually is.
Fingerpicking is just using your individual fingers to pluck strings instead of sweeping a pick across them. The mechanics are simple; the magic is in the patterns. This guide covers what fingerpicking is, which fingers do what, the standard hand position, your first few patterns, and how to build the technique steadily without the frustration that makes beginners give up. It assumes you can hold a few chords; everything about the picking hand starts from zero.
What Fingerpicking Actually Is
Fingerpicking (also called fingerstyle) means plucking the strings with the fingertips and thumb of your picking hand rather than with a pick. Where a strum sweeps across multiple strings as one gesture, fingerpicking sounds strings individually or in small groups, each finger responsible for its own strings. This lets you play a bass line, chords, and a melody simultaneously — which is why a single fingerpicked guitar can sound surprisingly full, like more than one instrument.
The fundamental difference from strumming is independence. In strumming, your picking hand moves as one unit. In fingerpicking, each finger acts semi-independently, plucking its own strings in its own rhythm. That independence is the entire skill, and it’s why fingerpicking feels awkward at first — you’re asking your fingers to do separate jobs at the same time, which they’ve never been asked to do. The good news is that it develops faster than most beginners expect, because the underlying patterns repeat.
The Roles: Which Finger Does What
Fingerpicking assigns specific strings to specific fingers. This division of labor is the foundation everything else builds on, and getting it consistent from the start saves a lot of relearning later.
The thumb plays the bass strings
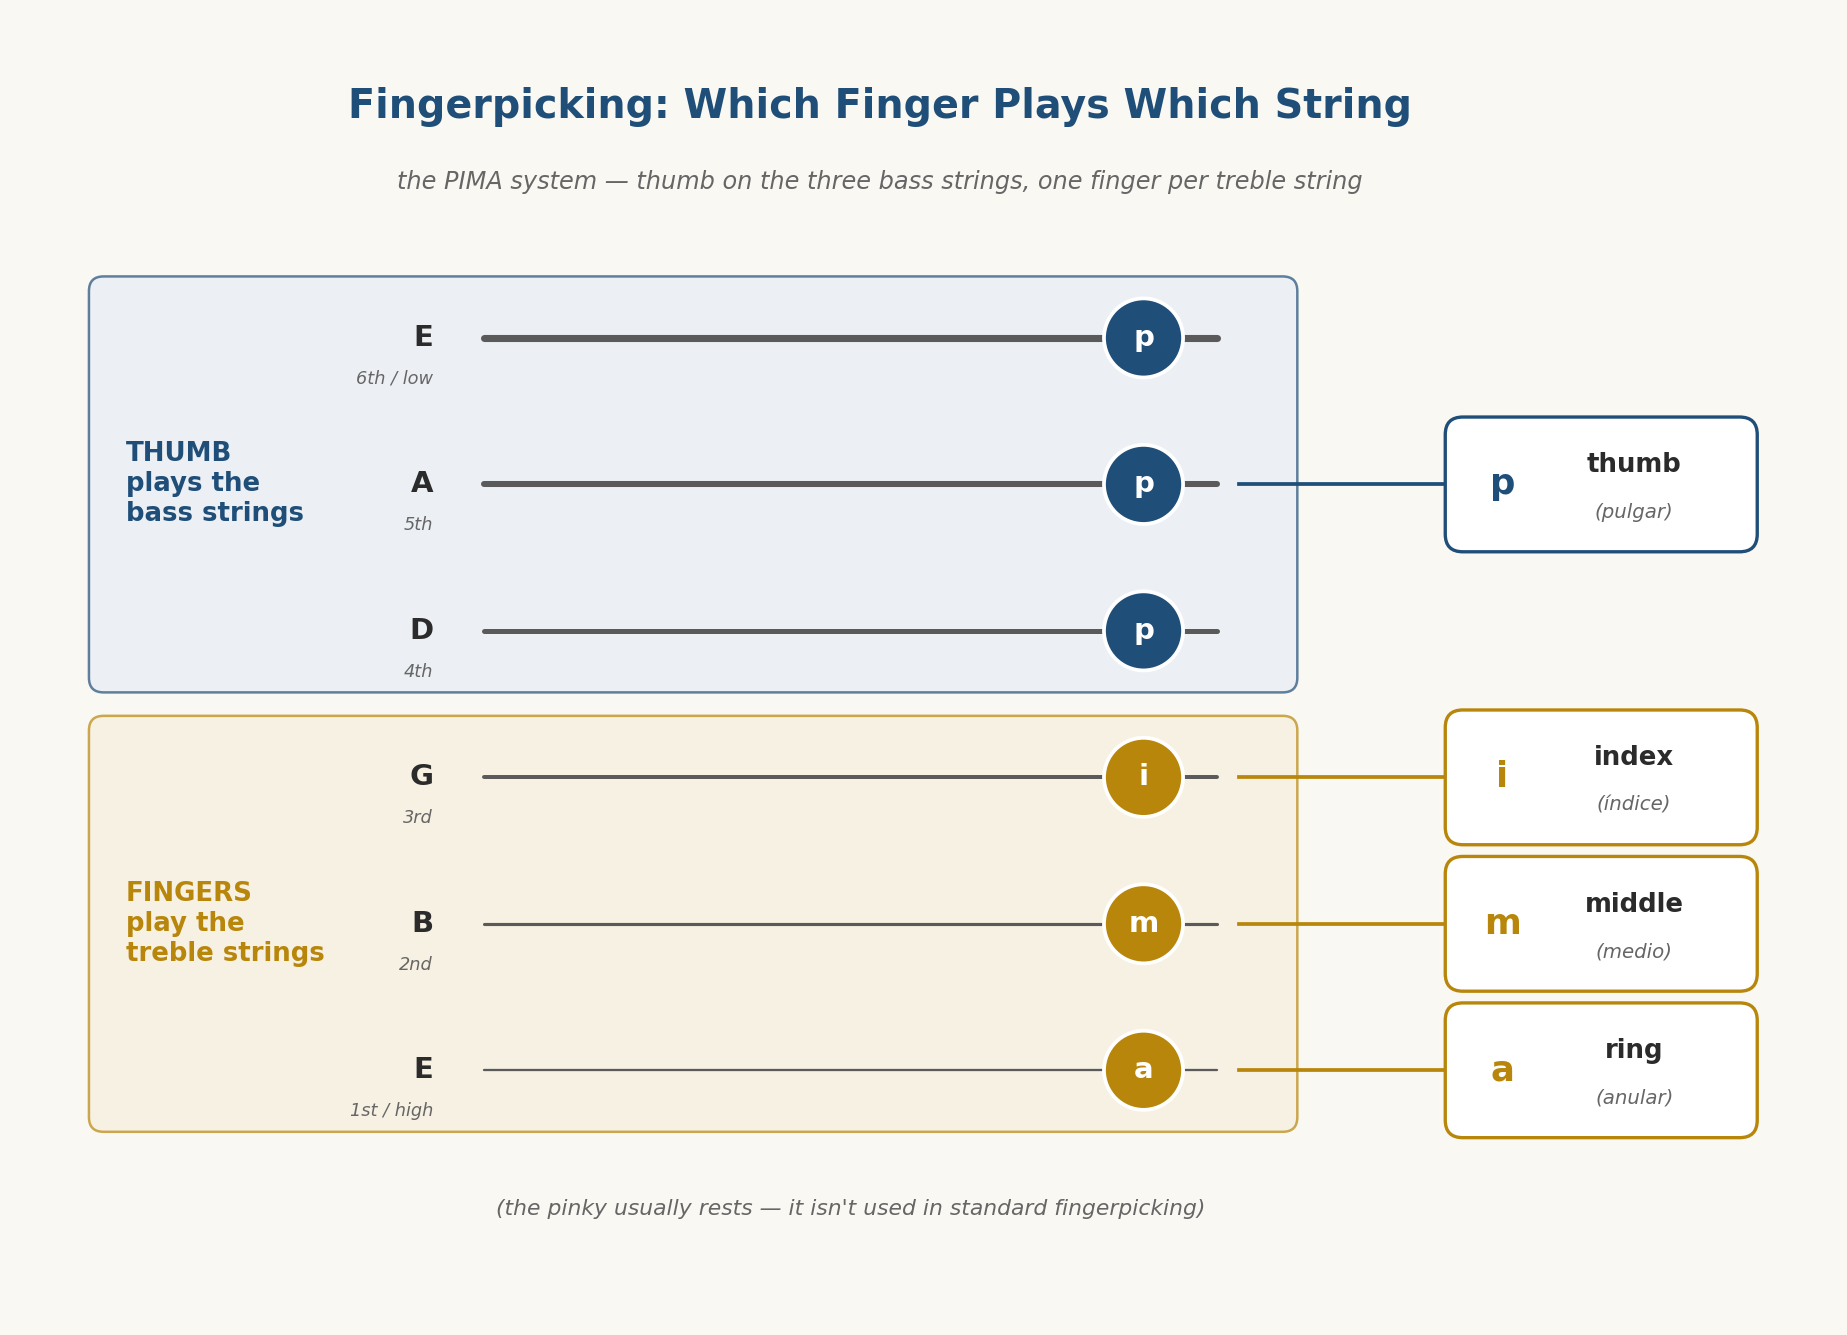
Your thumb handles the three thickest strings — the low E, A, and D strings. These are the bass strings, and the thumb provides the low, anchoring notes underneath everything else. The thumb plays with a slightly different motion than the fingers: it pushes down and slightly outward, brushing through the string, rather than plucking up the way the fingers do.
The fingers play the treble strings
Your index, middle, and ring fingers handle the three thinnest strings, in a standard one-finger-per-string arrangement:
- Index finger plays the G string (3rd string)
- Middle finger plays the B string (2nd string)
- Ring finger plays the high E string (1st string)
Your pinky generally isn’t used in standard fingerpicking — it rests, unused, most of the time. The fingers pluck by curling slightly inward toward the palm, drawing the string up and releasing it. The motion is small and comes mostly from the finger, not the whole hand.
The PIMA system
Fingerpicking instruction uses a standard shorthand borrowed from classical guitar, based on the Spanish names for the fingers. It’s worth learning because every piece of fingerstyle instruction you’ll ever encounter uses it:
- p = thumb (pulgar)
- i = index (índice)
- m = middle (medio)
- a = ring (anular)
So a fingerpicking pattern written as “p i m a” means: thumb, then index, then middle, then ring, in sequence. Once you know PIMA, you can read any fingerpicking pattern. We’ll use it throughout the rest of this article.
Hand Position for Fingerpicking
Good fingerpicking starts with a relaxed, well-positioned hand. The position is different from strumming, and getting it right early prevents tension and builds accuracy.
Rest your forearm on the guitar as usual, and let your picking hand hang over the strings near the sound hole (on an acoustic). Your wrist should arch gently so your fingers can approach the strings from above, curled, with the fingertips falling naturally onto the treble strings. The thumb sits forward and slightly to the left of the fingers — out ahead of them, not tucked behind — so it has clear room to play the bass strings without colliding with the fingers.
A useful mental image: your hand is shaped roughly as if holding a small ball, with the fingers curved over the treble strings and the thumb resting on a bass string. Keep the wrist relaxed and only slightly bent; a sharply bent wrist causes strain and limits finger movement, exactly as it does on the fretting hand. The whole hand should feel loose and poised, not tense or clenched.
Some players anchor lightly by resting the pinky or the heel of the palm on the guitar body for stability. This is optional and somewhat debated — a light anchor can help accuracy early on, but pressing hard creates tension. If you anchor, keep it feather-light. Many players don’t anchor at all and let the hand float. Try both and keep whatever lets your fingers move freely and accurately.
Nails or No Nails?
A question every fingerpicker eventually faces: do you pluck with the flesh of your fingertips, with your nails, or with a combination? The short answer for beginners: start with flesh, and don’t worry about nails yet.
Flesh produces a warmer, softer tone and requires no maintenance. Nails (slightly grown and shaped on the picking hand) produce a brighter, louder, more articulate tone and are standard in classical and much fingerstyle playing — but they require upkeep, careful shaping, and can break at inconvenient times. Most players eventually settle on a slight nail length that catches the string after the flesh, getting a blend of warmth and brightness. None of this matters in your first months. Use your fingertips, build the technique, and experiment with nails later once the mechanics are solid. The technique matters infinitely more than the nails at this stage.
Your First Pattern: The Simple Four
Here’s the pattern to start with — clean, foundational, and used in a huge number of songs. Hold any chord you know (an Em or an Am is a good first choice because they’re easy to hold while you focus on the picking hand).
The pattern, in PIMA: p, i, m, a — thumb, index, middle, ring, one after another, evenly spaced.
- Thumb (p) plucks the bass string of the chord — for Em, that’s the low E (6th) string. This is your bass note.
- Index (i) plucks the G (3rd) string.
- Middle (m) plucks the B (2nd) string.
- Ring (a) plucks the high E (1st) string.
Play these four plucks slowly and evenly, then repeat the whole sequence. That’s the pattern. It produces a gentle ascending ripple — bass note, then three rising treble notes — that sounds musical immediately, even at slow speed. Practice it on one chord until it’s even and relaxed, then try changing chords between repetitions, keeping the picking pattern identical while the fretting hand moves.
| Start absurdly slowly: Fingerpicking patterns reward slow practice more than almost anything else in guitar. Play the pattern at a speed where every note is clean and even — probably slower than feels musical. Evenness matters far more than speed; a slow, even pattern sounds beautiful, while a fast, uneven one sounds like stumbling. Speed arrives on its own once the pattern is automatic. |
Your Second Pattern: Adding the Thumb’s Rhythm
Once the simple four feels comfortable, the next step introduces the idea that makes fingerpicking sound full: the thumb keeping a steady bass while the fingers play above it.
Try this pattern: p, i, m, i — thumb, index, middle, index. The thumb plays the bass on beat one, and the fingers create a rolling pattern above. Then, on the repeat, have the thumb move to a different bass string — alternating between the two lowest strings of the chord. This alternating bass is the heart of folk and country fingerpicking, and it’s the gateway to the most famous fingerpicking style of all.
Travis Picking: The Pattern Behind a Thousand Songs
Once the alternating bass clicks, you’re at the doorstep of Travis picking — named after Merle Travis, and the foundation of an enormous amount of folk, country, and acoustic pop fingerstyle. If you’ve heard a fingerpicked acoustic guitar that sounds rolling and hypnotic, with a steady bass pulse underneath, you’ve heard Travis picking.
The essence: the thumb keeps a steady, metronomic alternating bass — bouncing between two bass strings on every beat — while the fingers pick treble notes in the spaces between and on top of the thumb’s pulse. The independence required (thumb doing one steady thing, fingers doing another thing on top) is the hardest part of beginning fingerpicking, and also the most rewarding when it clicks.
Don’t expect Travis picking to come quickly. The thumb-finger independence takes weeks to develop — the thumb has to become so automatic that it keeps its steady pulse without conscious attention, freeing your mind to direct the fingers. The path there: practice the alternating thumb bass completely alone first (no fingers, just the thumb bouncing between two strings in steady time) until it’s mindless. Then add a single finger note. Then more. Building the thumb’s autonomy first is the key that unlocks the whole technique.
How to Practice Fingerpicking (The Right Way)
- Isolate the picking hand. Hold one easy chord and focus entirely on the right hand. Don’t combine learning a new pattern with learning chord changes — one new thing at a time.
- Go slowly and prioritize evenness. Every note the same volume, every gap the same length. A metronome helps enormously here. Slow and even beats fast and ragged every time.
- Build thumb independence separately. For alternating-bass patterns, practice the thumb alone until it runs on autopilot before adding fingers. This is the single highest-leverage fingerpicking practice technique.
- Add chord changes last. Once a pattern is automatic on one chord, practice it while slowly changing chords — keeping the picking pattern identical as the fretting hand moves.
- Learn a real song early. Find a simple fingerpicked song using patterns you know. Applying the technique to actual music is more motivating and more instructive than endless pattern drills.
Common Fingerpicking Mistakes
- Uneven notes. The most common issue — some notes loud, some quiet, some rushed. The fix is slow practice with attention to making every pluck identical. Evenness is the whole game.
- Tense hand. Beginners clench the picking hand under concentration. Fingerpicking should feel light and relaxed; tension kills both tone and speed. Shake the hand out and restart loose.
- Inconsistent finger assignment. Using whichever finger feels convenient instead of the standard assignment (i-G, m-B, a-high E). The standard assignment exists because it scales to harder patterns; improvising finger choices early creates habits you’ll have to undo.
- Rushing to Travis picking. The thumb independence isn’t ready in week one. Build the simpler patterns first; Travis picking rests on top of the skills the simple patterns develop.
- Looking only at the fretting hand. Beginners watch their chord hand and ignore the picking hand, then wonder why the picking is sloppy. Watch your picking hand while learning a pattern — it needs more attention.
Fingerpicking on Acoustic vs. Electric
Fingerpicking works on any guitar, but the experience differs. Acoustic guitars — especially with their wider string spacing and fuller resonance — are the traditional home of fingerstyle, and most fingerpicking music is written for them. Electric guitars have narrower string spacing, which makes individual-string accuracy slightly harder at first, but they’re entirely capable of fingerstyle, and many great players fingerpick on electric.
Classical and nylon-string guitars deserve a mention: their wide spacing and soft strings make them especially friendly to fingerpicking, which is why classical guitar is almost entirely fingerstyle. If you have access to a nylon-string guitar and want to focus on fingerpicking, it’s a forgiving place to learn. But any guitar you have will do — the technique transfers completely across all of them.
The Takeaway
Fingerpicking looks intimidating and is actually a small set of fundamentals: the thumb takes the bass strings, the fingers take the treble strings in a fixed assignment, and patterns are just sequences of which finger plucks when. Learn the PIMA shorthand, get the relaxed hand position, start with the simple four-finger pattern, and build toward alternating bass and eventually Travis picking — each resting on the one before.
The whole technique rewards patience and evenness over speed. A slowly fingerpicked pattern where every note rings clean and even sounds genuinely beautiful; there’s no stage of fingerpicking where you have to sound bad to make progress. Build the thumb’s independence first, keep the hand relaxed, add one element at a time, and within a couple of months, you’ll be producing that interwoven, harp-like sound that drew you to fingerpicking in the first place.

Further Reading
- How to Use a Guitar Pick — the other picking-hand technique, for comparison
- Strumming Patterns for Beginners — rhythm-hand fundamentals that complement fingerpicking
- Guitar Chords for Beginners — the chords to fingerpick over
- How to Play Guitar: A Complete Beginner’s Guide — where fingerpicking fits in the bigger picture