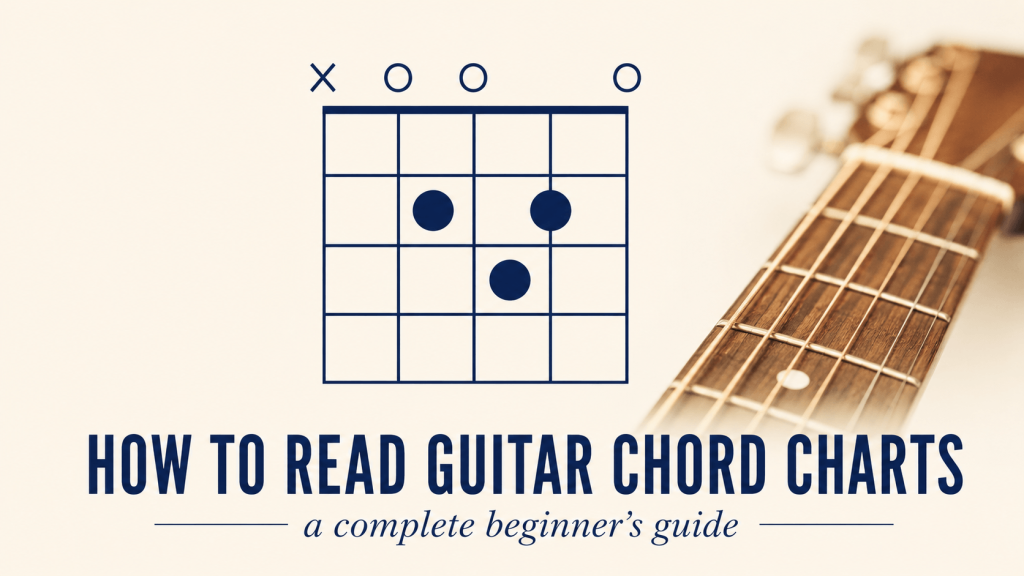
Chord charts are the universal language of guitar. Almost every chord you’ll ever learn — from a beginner G major to an advanced jazz voicing — can be communicated in a small grid of dots and lines that fits in a couple of square inches. Once you can read these diagrams, you can learn any chord from a book, a website, or an app without anyone having to show you in person.
The system looks cryptic at first — a little grid with dots, numbers, X’s and O’s — but it’s genuinely simple once someone explains what each part means. This guide explains every element of a chord chart from scratch, so that by the end, you can pick up any chord diagram and know exactly where to put your fingers. It’s written for absolute beginners; no prior knowledge assumed.
What a Chord Chart Actually Is
A guitar chord chart — also called a chord diagram — is a simple picture of the guitar’s neck, drawn as if you stood the guitar straight up in front of you and looked directly at the fretboard. It shows you exactly which strings to press, at which frets, with which fingers, to form a particular chord.
The key mental adjustment is the orientation. The diagram represents the guitar standing vertically, headstock at the top, as if the guitar were facing you. This means the layout doesn’t match what you see when you look down at the guitar in your lap — it matches what someone standing in front of you would see. This trips up almost every beginner at first, and we’ll come back to it, because getting the orientation right is the one genuinely confusing part.
The Grid: Strings and Frets
The basic chord chart is a grid of vertical and horizontal lines. Each represents something specific.
The vertical lines are the strings
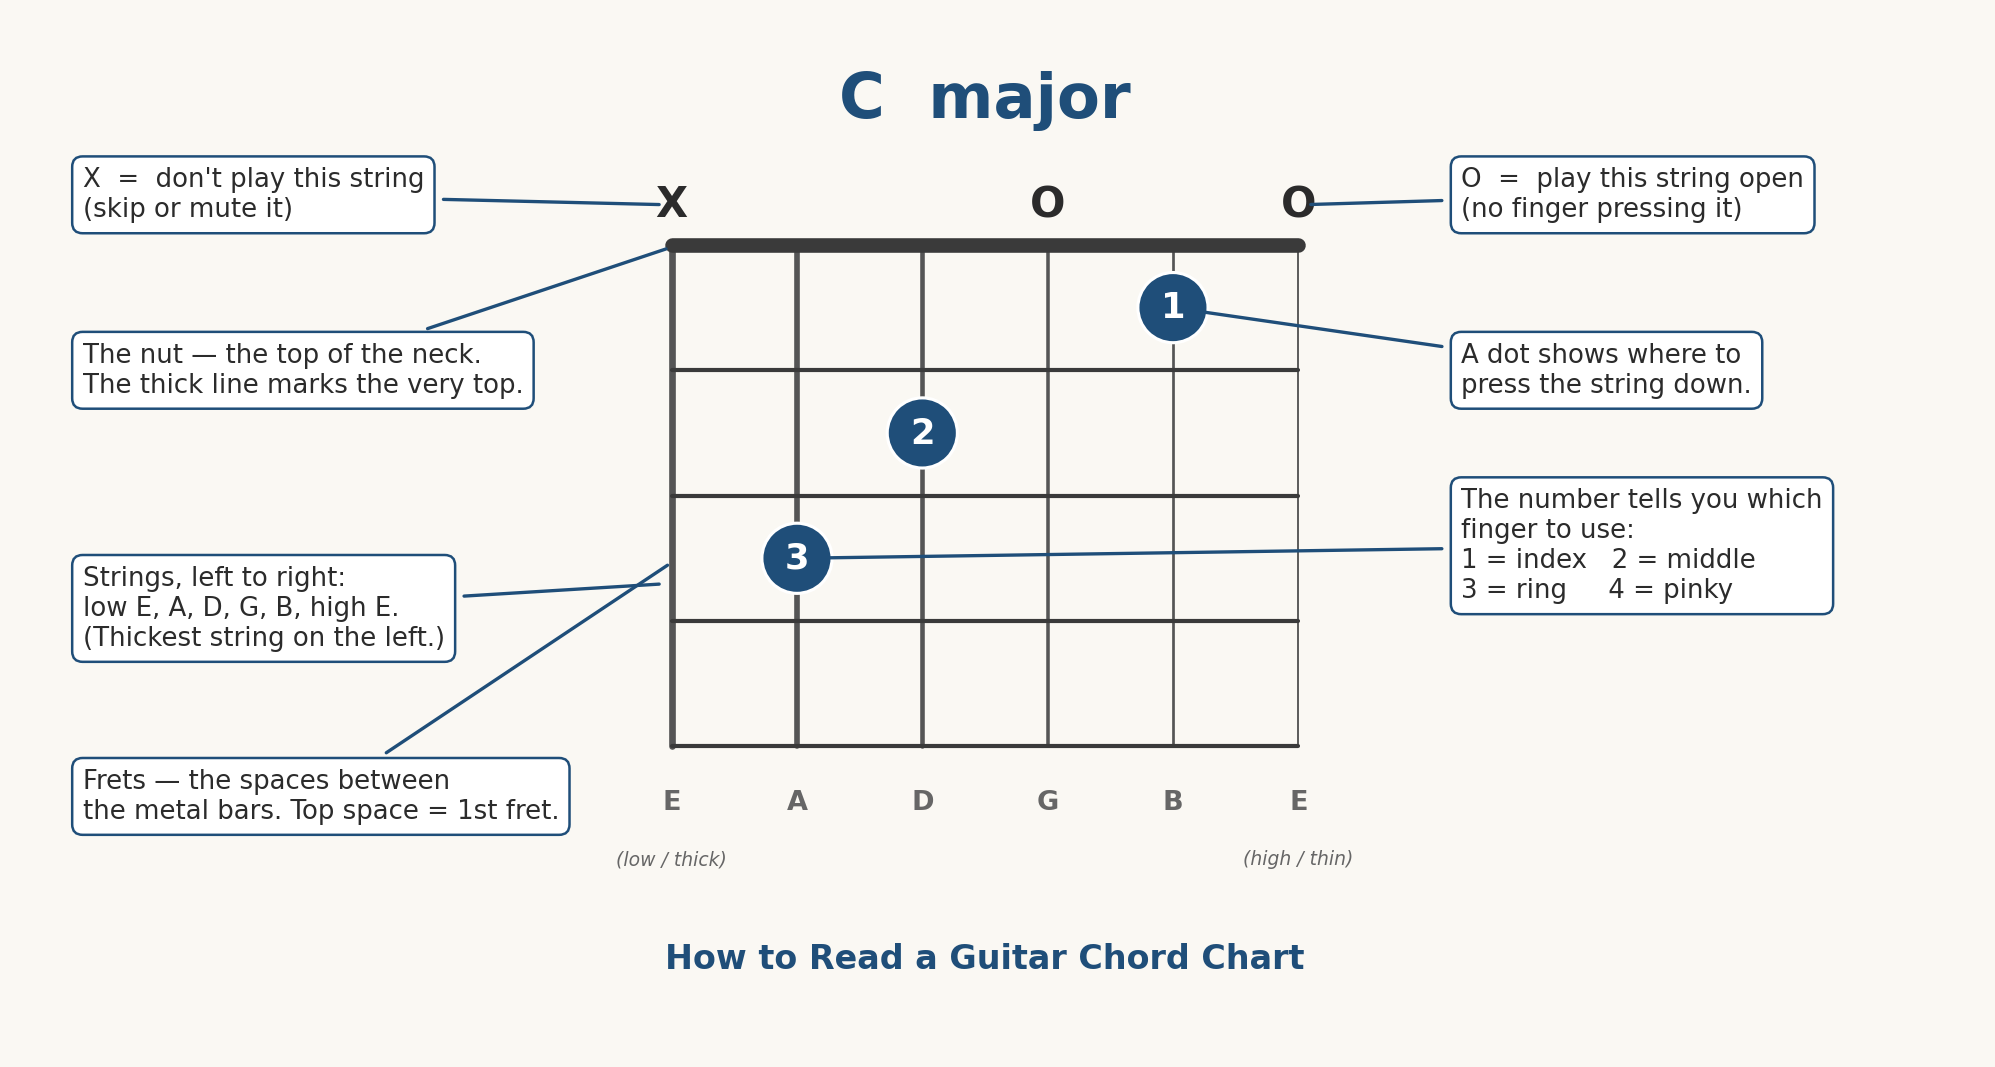
A standard chord chart has six vertical lines, one for each string of the guitar. Here’s the part that confuses everyone: the leftmost vertical line is the thickest, lowest-pitched string (low E), and the rightmost vertical line is the thinnest, highest-pitched string (high E).
Why is this confusing? Because when you hold the guitar in playing position and look down at it, the thickest string is closest to you (on top) and the thinnest is farthest (on the bottom). But the chord chart shows the guitar as if it’s facing you, standing up — so the strings appear in the order someone looking at the front of your guitar would see them. From low E on the left to high E on the right.
The strings, left to right on the chart, are: low E, A, D, G, B, high E. The same string names you tune to, just laid out left-to-right as the diagram views them.
The horizontal lines are the frets
The horizontal lines represent the metal fret bars on the guitar neck. The space between two horizontal lines is a fret — the area where you press the string down. The top horizontal line, usually drawn thicker or doubled, represents the nut (the white bar at the top of the neck where the strings cross before reaching the tuning pegs).
So the topmost space (just below the thick nut line) is the first fret. The next space down is the second fret. And so on. Most beginner chord charts show the first four or five frets, because nearly all beginner chords are played in that region of the neck.
The Dots: Where to Put Your Fingers
The dots (usually solid black circles) placed on the grid tell you where to press down. Each dot sits in a specific fret space on a specific string, telling you: press this string, in this fret.
A dot placed in the second-fret space on the A-string line means: press the A string down in the second fret. A dot in the first-fret space on the B-string line means: press the B string in the first fret. You read each dot the same way — find which vertical line (string) it’s on, and which horizontal space (fret) it sits in.
Finger numbers
Often, the dots contain numbers, or numbers appear just below the chart near each dot. These tell you which finger to use. The numbering system for the fretting hand is standard across virtually all guitar instruction:
- 1 = index finger
- 2 = middle finger
- 3 = ring finger
- 4 = pinky (little finger)
Your thumb is not numbered in standard chord charts — it stays behind the neck for nearly all beginner chords and isn’t used to fret strings. So a dot marked “2” on the D string at the second fret means: press the D string at the second fret using your middle finger. The finger numbers are suggestions based on what’s most efficient, and following them matters more than beginners think — the recommended fingering usually sets your hand up well for switching to the next chord.
The X’s and O’s Above the Chart
Above the top of the chart (above the nut line), you’ll usually see a row of symbols — X’s and O’s — one above each string. These tell you what to do with the strings that don’t have a dot on them. This is the part beginners most often ignore, and ignoring it is why their chords sound wrong.
O means play this string open
An O (the letter O, for “open”) above a string means: play this string, but don’t press it down anywhere. It rings open, unfretted. Open strings are a key part of many beginner chords — they’re what gives chords like G, C, D, Em, and Am their full, ringing sound. When you strum the chord, the open strings ring along with the fretted ones.
X means do not play this string
An X above a string means: do not play this string at all. It should be muted or skipped when you strum. Some chords don’t use all six strings — for example, many versions of the C chord and D chord leave out one or two of the lowest strings. The X tells you to avoid strumming those, either by not hitting them or by lightly muting them with a finger.
This matters more than beginners realize. If a chart shows an X above the low E string and you strum it anyway, the chord will sound muddy or wrong — you’re adding a note that doesn’t belong in the chord. Learning to skip or mute the X strings cleanly is part of making chords sound right, and it’s a skill that takes a little practice.
| Quick summary of the symbols: O above a string = play it open (unfretted). X above a string = don’t play it. A dot on a string = press it at that fret. Number in or near the dot = which finger to use. That’s the entire system. |
Reading a Chord Chart Step by Step
Let’s put it all together with the process you’d use to read any chord chart, using a hypothetical chord as the example.
- Check the chord name. The name (like G, Cmaj7, Am) is usually written above the chart. This tells you what chord you’re forming.
- Look at the X’s and O’s first. Before placing any fingers, see which strings are open (O), which are skipped (X), and which will be fretted (the ones with dots). This gives you the overall shape of which strings are involved.
- Place the fretted notes one at a time. For each dot, identify the string (vertical line), the fret (horizontal space), and the finger (number). Place that finger there. Work through all the dots.
- Check your hand against the chart. Once all fingers are placed, compare your hand to the diagram. Is each finger on the right string and fret? Are you avoiding the X strings?
- Strum and listen. Play the strings that should be played (open and fretted, skipping the X strings). Each note should ring clearly. If something buzzes or sounds muted, check that finger’s position.
With practice, this whole process compresses from a careful step-by-step reading into an instant glance. Experienced players look at a chord chart and form the chord in one motion. But it starts as the deliberate five-step process above, and there’s no shame in working through it slowly at first.
Chord Charts With a Fret Number
Most beginner chords are played near the top of the neck, in the first few frets, so the chart’s top line is the nut. But some chords are played further down the neck. For these, the chart shows a fret number beside the diagram.
When you see a number like “5fr” or just “5” written to the right of the top line of the chart, it means the top line is no longer the nut — it’s the fifth fret. The whole diagram has shifted down the neck. So a dot in the top space of that chart means the fifth fret area, not the first. This is how charts communicate chords played anywhere on the neck without having to draw the entire fretboard.
You won’t encounter this much as a beginner — nearly all your early chords live in the first few frets where the nut is the reference. But it’s worth recognizing the fret-number marking so it doesn’t confuse you when you eventually meet a chord played further down the neck.
Barre Lines: One Finger Across Multiple Strings
Some chord charts show a curved line or a thick bar spanning several strings in the same fret. This indicates a barre — pressing one finger (almost always the index finger) flat across multiple strings at once. Barre chords are a more advanced technique that takes time and finger strength to develop, and you’ll meet them after the open chords are solid.
On the chart, a barre is drawn as a line or arc connecting the strings it covers, usually with a single finger number. So a barre line across all six strings at the first fret, marked with a “1,” means: lay your index finger flat across all six strings at the first fret. The other dots on the chart show the additional fingers that complete the chord shape on top of the barre.
Don’t worry about barre chords yet if you’re just starting — they’re covered in their own article (Open Chords vs Barre Chords). But now you’ll recognize what the barre line means when you see it on a chart.
Chord Charts vs. Tab vs. Standard Notation
It’s worth briefly clarifying how chord charts relate to the other two ways guitar music gets written down, because beginners often confuse them.
- Chord charts (chord diagrams) show you how to form a single chord — which fingers go where. They’re a snapshot of one hand shape. That’s what this article covers.
- Tab (tablature) shows you a sequence of notes to play over time — a horizontal representation of the strings with numbers indicating which frets to play in what order. Tab is for melodies, riffs, and note-by-note playing, not for showing chord shapes.
- Standard notation is the traditional musical staff with notes on lines and spaces. It’s universal across all instruments but takes longer to learn to read fluently. Most beginner guitar players start with chord charts and tab, and learn standard notation later if at all.
For learning chords and playing songs — which is what most beginners want — chord charts are the essential tool. You can play hundreds of songs knowing only how to read chord charts and follow a chord progression. Tab and standard notation become useful later, for melodies and more detailed playing, but chord charts alone will take you a long way.
Common Beginner Confusions
“The strings look backwards from how I see them.”
This is the orientation issue, and it’s the most common confusion. Remember: the chart shows the guitar standing up, facing you, not the view you have looking down at it in your lap. The thickest (low E) string is on the left of the chart. When you hold the guitar, that thickest string is on top, closest to your face. The chart isn’t wrong and you’re not misreading it — it’s just a different viewing angle. After a few weeks it stops feeling backwards.
“My chord sounds wrong even though my fingers match the chart.”
Two usual culprits. First, check the X’s and O’s — are you accidentally strumming a string marked X, or muting a string marked O? Second, check that each finger is pressing cleanly just behind the fret with its tip, not muting an adjacent string. A chord can have every finger on the technically correct string and fret and still sound wrong if a finger is leaning against a neighboring string it shouldn’t touch.
“Do I have to use the exact fingers the chart shows?”
For beginners, yes, follow the suggested fingering. The recommended fingers are chosen to make the chord efficient to form and, importantly, to set your hand up well for switching to common next chords. As you advance, there are situations where alternative fingerings make sense, but those are exceptions you’ll learn later. Early on, the suggested fingering is suggested for good reasons — trust it.
The Takeaway
A chord chart is just a picture of the guitar neck standing up and facing you, with dots showing where to press, numbers showing which fingers to use, and X’s and O’s above showing which strings to skip or play open. That’s the entire system, and once it clicks — usually within a few days of using it — you can learn any chord in the world from a diagram, no teacher required.
The orientation is the one genuinely confusing part, and it sorts itself out with a little time. Everything else is straightforward. Start by reading the charts for the basic open chords, work through them slowly with the five-step process, and within a week, the diagrams will feel like second nature. From there, the entire library of guitar chords is open to you — every chord book, every song site, every app speaks this same simple language.
Further Reading
- Guitar Chords for Beginners — the 8 essential chords, with diagrams you can now read
- How to Play Guitar: A Complete Beginner’s Guide — the foundational pillar this supports
- How to Switch Chords Faster — the next skill once you can form chords from charts
- Open Chords vs Barre Chords — understanding the barre lines you’ll see on some charts